I’ve been working with web applications quite a bit lately and have been finding myself wanting to work with proof-of-concepts in order to explore certain types of vulnerabilities and attacks. I decided to work with the Apache web-server and PHP (on CentOS) to help with my journey. What follows are my notes for setting everything up.
The gist of this initial lab setup will be to create multiple origins where all requests and responses are logged.
You’re going to be working with three virtual hosts. You’ll need to configure the DNS so the local Apache server can resolve what it needs to. Add the following three lines to your /etc/hosts file.
192.168.0.110     foo.example.local
192.168.0.110     bar.example.local
192.168.0.110     foo.bar.local
Add the following to /etc/httpd/conf/httpd.conf.
<Directory /www/docs>
     Require all Granted
     AllowOverride None
</Directory>

# To capture http requests
DumpIOInput On

# To capture http responses
DumpIOOutput On
Alter /etc/httpd/conf/httpd.conf by changing the LogLevel to ‘dumpio:trace7’.
LogLevel dumpio:trace7
Create the file /etc/httpd/conf.d/account.example.local.conf with the following contents.
<VirtualHost *:80>
     ServerAdmin webmaster@account.example.local
     DocumentRoot /www/docs/account.example.local
     ServerName account.example.local
     ErrorLog /var/log/httpd/account/error_log
     CustomLog /var/log/httpd/account/access_log common
</VirtualHost>
Create the file /etc/httpd/conf.d/sales.example.local.conf with the following contents.
<VirtualHost *:80>
     ServerAdmin webmaster@sales.example.local
     DocumentRoot /www/docs/sales.example.local
     ServerName sales.example.local
     ErrorLog /var/log/httpd/sales/error_log
     CustomLog /var/log/httpd/sales/access_log common
</VirtualHost>
Create the file /etc/httpd/conf.d/foo.bar.local.conf with the following contents.
<VirtualHost *:80>
     ServerAdmin webmaster@foo.bar.local
     DocumentRoot /www/docs/foo.bar.local
     ServerName foo.bar.local
     ErrorLog /var/log/httpd/foobar/error_log
     CustomLog /var/log/httpd/foobar/access_log common
</VirtualHost>
Execute the following commands to set up your directory structure.
mkdir -p /www/docs/account.example.local /var/log/httpd/account
mkdir -p /www/docs/sales.example.local /var/log/httpd/sales
mkdir -p /www/docs/foo.bar.local /var/log/httpd/foobar
If you have selinux running you’ll want to execute the following:
semanage fcontext -a -t httpd_sys_content_t "/www(/.*)?"
restorecon -R -v /www
Note: If you want to allow the web-service to write to a file you need to execute something like the following. I believe this also works for directories. YMMV.
FILE="/var/www/html/form/profile.csv"
semanage fcontext -a -t httpd_sys_rw_content_t "$FILE"
restorecon -v $FILE
If you’re curious, the context types…
httpd_sys_content_t
Use this type for static web content, such as .html files
used by a static website. Files labeled with this type are
accessible (read only) to httpd and scripts executed by
httpd. By default, files and directories labeled with this
type cannot be written to or modified by httpd or other
processes. Note that by default, files created in or copied
into /var/www/html/ are labeled with the
httpd_sys_content_t type.
httpd_sys_rw_content_t
Files labeled with this type can be written to by scripts
labeled with the httpd_sys_script_exec_t type, but
cannot be modified by scripts labeled with any other
type. You must use the httpd_sys_rw_content_t type
to label files that will be read from and written to by
scripts labeled with the httpd_sys_script_exec_t type.
Create some content for testing purposes:
for HOST in account.example.local sales.example.local foo.bar.local; do
     echo "<html><body><h1>$HOST</h1><p>Hello world</p></body></html>" > /www/docs/${HOST}/index.html
done
Now restart your Apache server and see if you can browse to the sites you’ve just created. You may need to edit the hosts file (C:\Program Files\Windows\System32\drivers\hosts) on your client machine in the same manner as the one on the server.
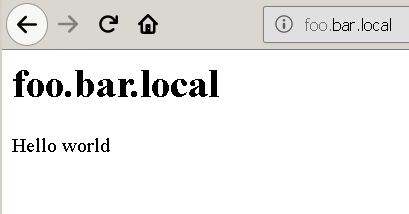
You should see something like the following when visiting the base address of each virtual host.
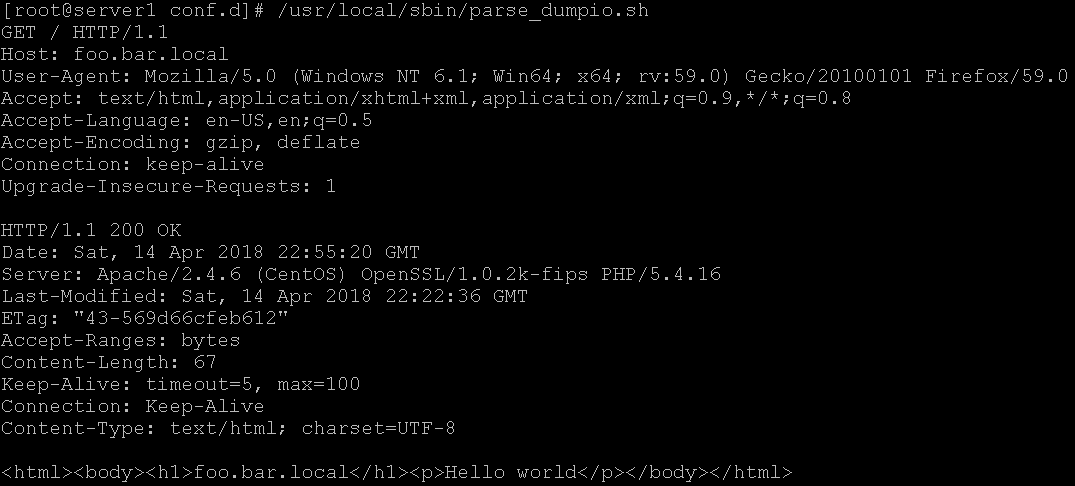
We added some directives to alter how Apache logs. Through the use of mod_dumpio you can view all web-server requests and responses. The default error log will contain the information we’re looking for. It’s a bit noisy so I hacked up a little script to clean everything up.
Create a script with the following contents.
#!/bin/bash

LOG="$1"

if [[ -z $LOG ]]; then
 LOG="/var/log/httpd/error_log"
fi

grep 'data-' "$LOG" | grep -v ': [0-9]* bytes' | \
     perl -pe 's|.*?\(data-.*?\): ||g' | \
     sed 's/\\r\\n$//g' | \
     sed 's/\\r\\n/\n/g' | \
     sed 's/\\n/\n/g'
This should work out something like the following:
At this point you now have a platform to begin researching web application fundamentals. This very basic lab setup provides you with control of three different origins (at all levels of the stack) and the ability to review requests and responses at the client and server level.
Future posts will look into into the same origin policy, cross-domain issues, creating vulnerable pages, testing attacks, and looking into security headers. I may also create a quick post on setting up MySQL (MariaDB) to help out with SQL injection research.


