I’ve been meaning to compile a bunch of Burp Suite tips for a while now. Stuff I’ve learned from others and things I’ve picked up along the way. This is the first installment of such helpful tips. I’ll be looking to pump out at least three posts in the short-term and then add more as I continue on down the line.
With that said… I will begin this journey by touching on some of the configurations I make before I begin testing.
Installing Burp’s CA certificate
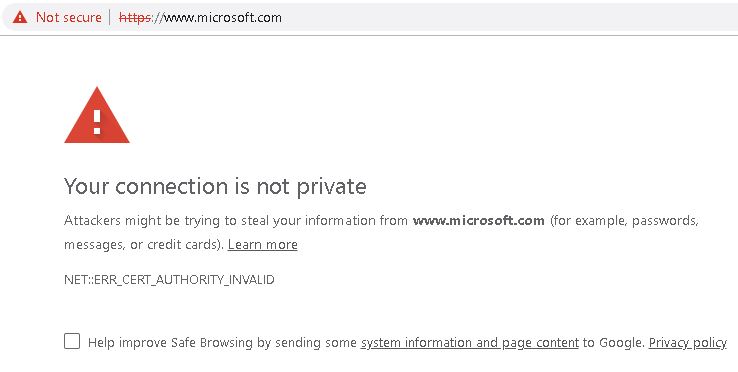
The first thing I like to do when making use of Burp actually involves the user agents (web browsers) I employ during testing. To prevent receiving errors related to invalid certificates in whatever browser you’re using, import Burp’s CA certificate.
 Taken straight from Portswigger’s website.
By default, when you browse an HTTPS website via Burp, the Proxy generates an SSL certificate for each host, signed by its own Certificate Authority (CA) certificate. This CA certificate is generated the first time Burp is run, and stored locally. To use Burp Proxy most effectively with HTTPS websites, you will need to install Burp’s CA certificate as a trusted root in your browser.
No need for me to work up any screens or instructions. Portswigger has you covered right here.
Work through these instructions to browse TLS/SSL enabled sites without having to accept the certificates created by Burp for each unique site you visit.
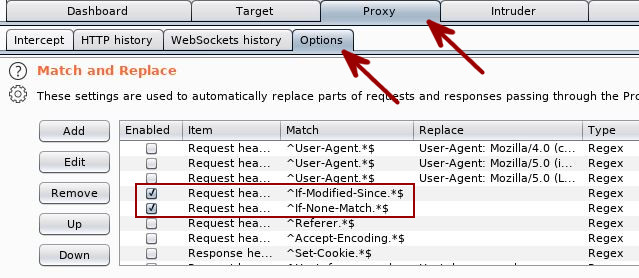
Require a fresh, non-cached response from the server.
You can force all responses to contain non-cached versions of the requested page by enabling two pre-built match-and-replace rules in Burp’s proxy options. I like doing this to ensure I am seeing the latest version of the file hosted by the server. Follow the path Proxy Tab -> Options Tab -> Match and Replace to make this config change.
Disabling XSS Protection headers
You can perform the same type of match-and-replace as used in the previous section to prevent your user agent from taking action on any provided XSS-related security headers. The only difference here is the addition of the ‘X-XSS-Protection’ header with a value of zero to ensure no browser defaults are still in play. Follow the path Proxy Tab -> Options Tab -> Match and Replace to make this config change.
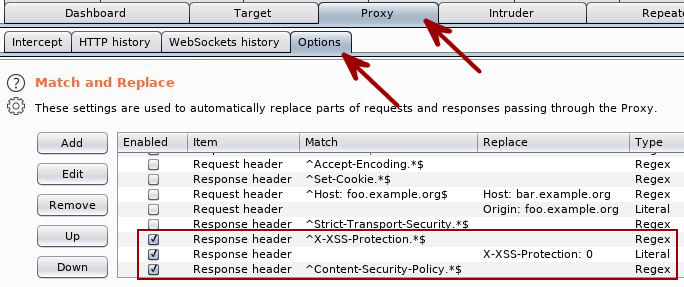
You can also use this technique to introduce headers into requests to mark your activity. Your employer or one of their clients may request that you do this at some point.
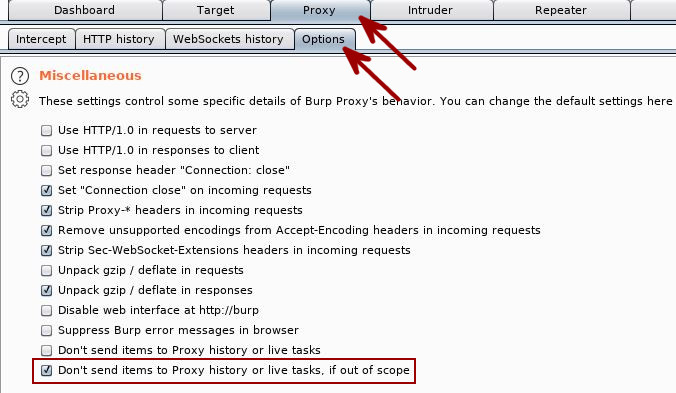
Keeping your Proxy History Clean
Also on the Proxy -> Options tab, exists the ability to suppress logging out-of-scope request/response information to the Proxy History tab. There will certainly be times when you want to analyze all traffic generated by a target. What a target interacts with can be very important information to capture during a test. At the same time, having a clean history to search through and reducing the size of your project file may come in handy as you progress into your testing.
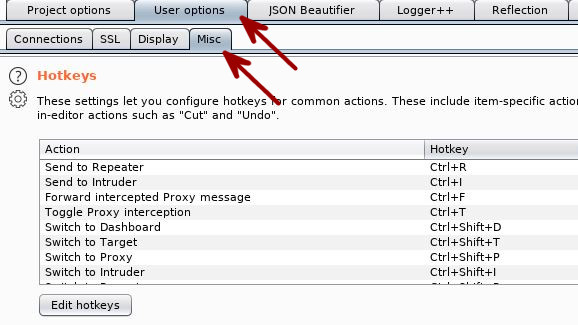
Using Keyboard Shortcuts (HotKeys)
Something that will quickly come in handy while using Burp Suite are the keyboard shortcuts it provides. Hit the User Options -> Misc tab and check out some of the available HotKeys.
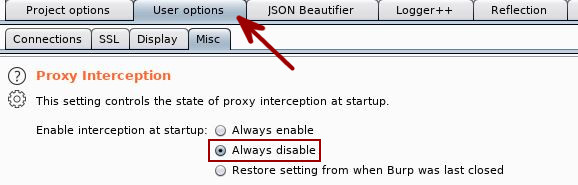
Disabling Proxy Interception on Startup
If you’re anything like me, you’ll fire up Burp Suite and ponder at why you can’t connect to your test app. Pretty much every damn time. So instead of falling into this repeated nightmare of your own doing, simply disable interception on startup. Follow the User Options -> Misc -> Proxy Interception path and select the ‘Always Disable‘ option.
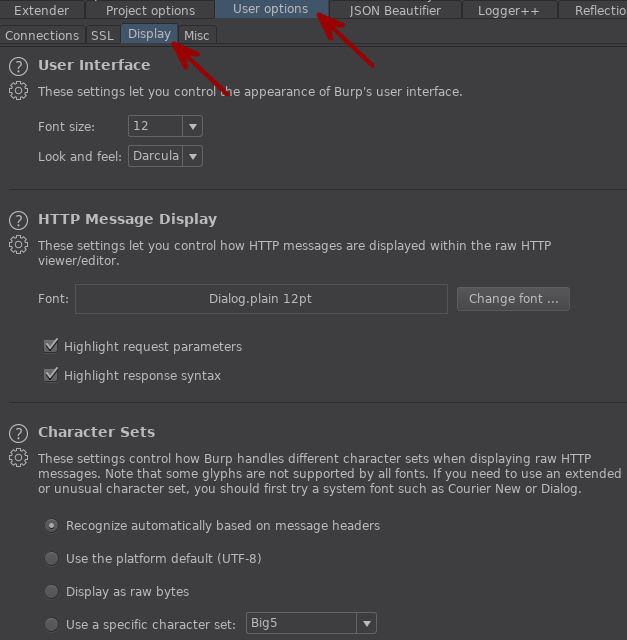
Burp Themes
Something I REALLY enjoy having is a dark theme. My eyes are really light sensitive and having darker skins/themes for applications is a godsend. Burp has a few customization available that can be made to the look and feel of its interface. Follow the User Options -> Display path and check out some of the options.
Privacy Settings
As much as we love PortSwigger and trust them with all the data, our employers and clients may not want data originating from their networks going outside of their networks. As such, you will probably want to disable the transmission of anonymous feedback that is sent to PortSwigger. Follow the User Options -> Misc -> Performance Feedback path and disallow the transmission of data.

You may want to enable this setting if you encounter an issue with Burp Suite and need to contact PortSwigger support. Just keep it in mind that you’ve got it disabled.
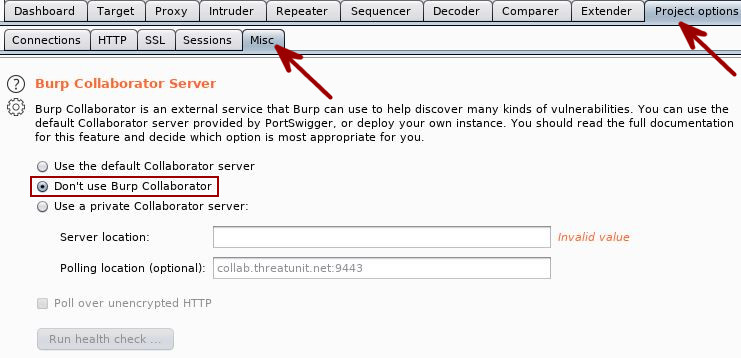
Additionally, Burp Suite allows you to test if an application is vulnerable to various issues that involve the access of remote services. A service known as Burp Collaborator is what allows Burp Suite to do this. Collaborator is an awesome tool but something better left for a later discussion. Regardless, you may want to disable its use until you’ve configured a server of your own as it would place data from your engagement on a third-party’s systems.